My desktop’s hard drive just started making a loud clicking noise and now Windows won’t boot. This drive has years of personal photos, work files, and documents I never backed up. I’m worried powering it on might make things worse, but I really need to save the data if possible. What are my best options to safely recover files from a clicking hard drive, and what should I avoid doing so I don’t cause permanent damage?
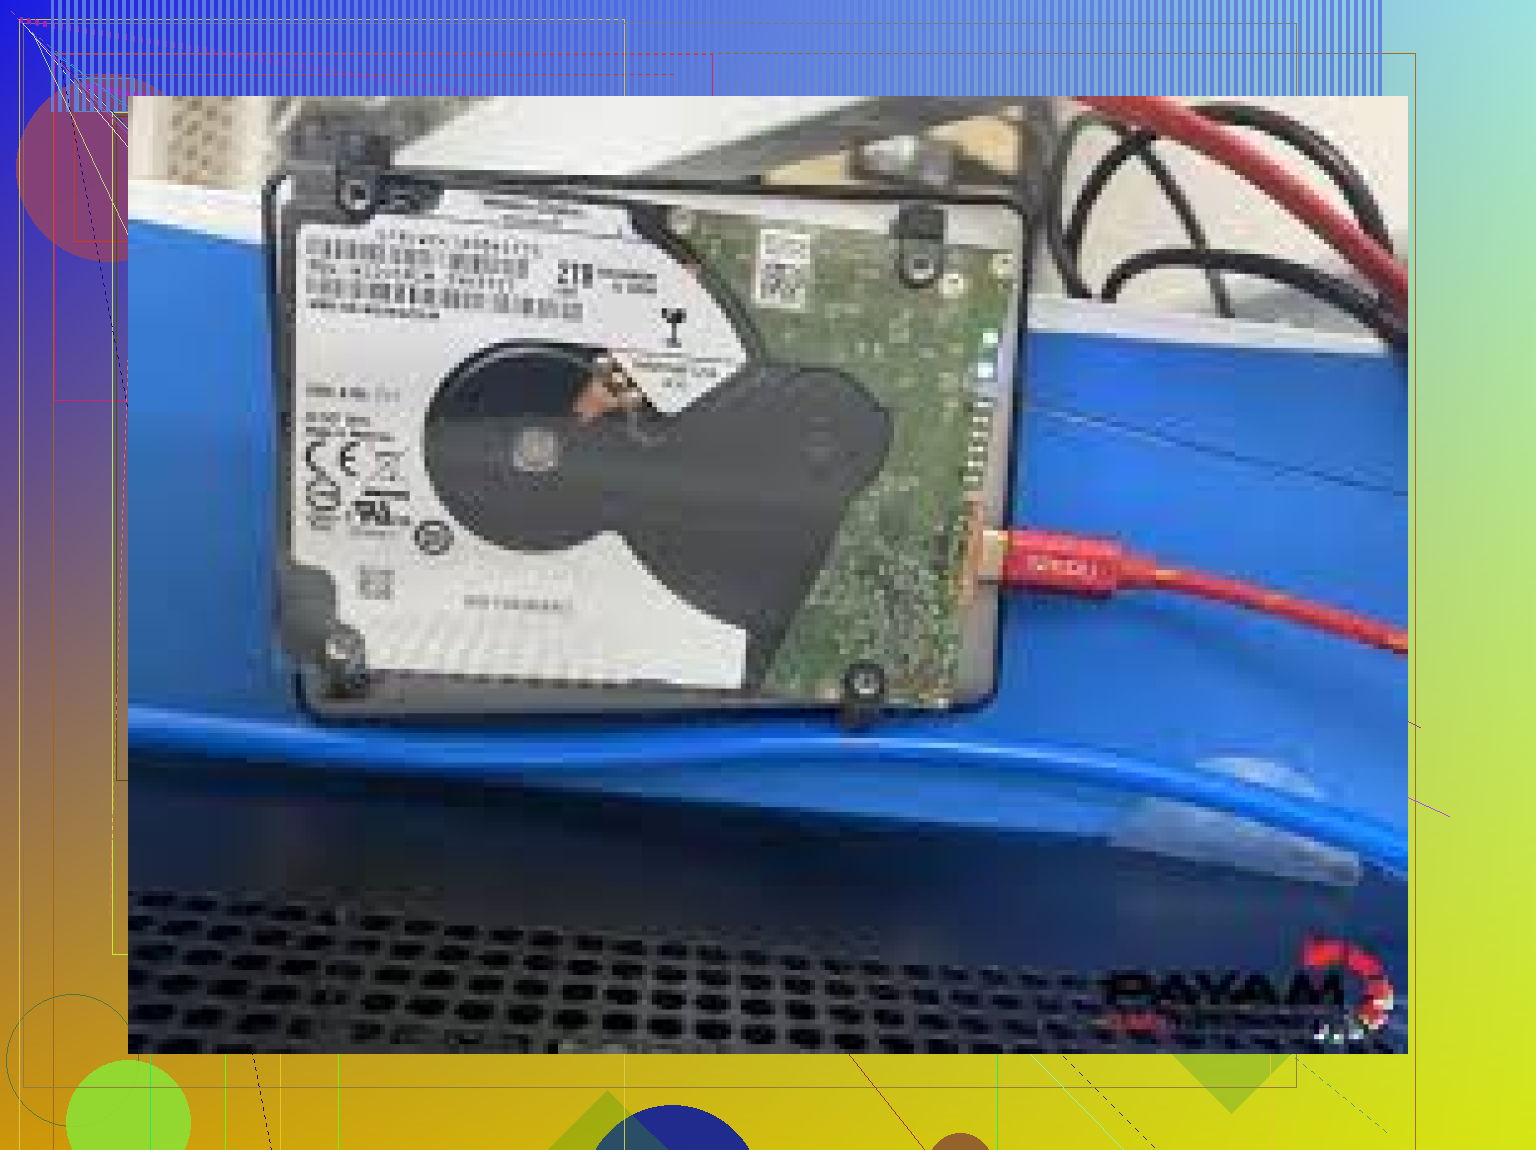
So my WD Elements 1 TB drive started clicking about three days ago and I did what most people do the first time. I freaked out, unplugged it, plugged it back in, waited for Windows, nothing, repeated that cycle way too many times. Took me way longer than I want to admit before I stopped forcing it.
Here is the part I wish someone had hit me over the head with on day one: that repeating click from a hard drive is almost never a “software glitch”. It is usually the drive trying and failing to read itself. Most of the time it is either:
- Heads are damaged or unable to calibrate.
- Platters are struggling to spin up properly or the drive keeps resetting.
Once it starts doing that, no recovery program fixes it, because the drive is not reading data correctly in the first place.
What I learned the hard way
The first useful thing I did was stop powering it on at all. Every extra power cycle on a drive that clicks increases the odds of:
- Heads scraping the platter.
- Heads slamming back to the parking ramp again and again.
- Media damage that turns “difficult recovery” into “no recovery”.
Once platters get scratched, your data is usually gone in those areas. No software overcomes physical damage.
So if your drive is clicking right now and you are still experimenting with cables and ports, stop. Leave it.
Thread that helped me
I ended up on this thread about clicking-drive recovery:
https://discussion.7datarecovery.com/forum/topic/whats-the-best-way-to-recover-data-from-a-clicking-hard-drive/
That was the first place I saw people explain the situation in plain language, with real failures and not tool marketing. The useful part for me was:
- Where they draw the line between “try software once, carefully” and “do not touch this, send it to a lab”.
- Specific behavior patterns of drives that are basically write-offs if you keep powering them.
Patterns people kept repeating
Across that thread and a bunch of similar ones, the same rule kept coming up from people who work on drives:
- Rhythmic clicking then power off
If the drive:
- Spins up.
- Clicks in a repeating pattern.
- Tries to recalibrate.
- Then gives up and powers down or disappears from the system.
That usually points to a head issue or some internal mechanical fault, not a filesystem thing. DIY tools will not fix failed heads. At best you waste time. At worst you turn a recoverable case into a platter-damage case.
- A couple of clicks, still spins, partially detected
Different story if:
- You hear one or two clicks at start.
- The drive then reaches full spin speed.
- BIOS or the OS sees the drive by model name or capacity, even if it is slow or keeps dropping.
Those are the rare cases where people sometimes manage to:
- Use imaging software to clone the drive sector by sector.
- Work from the clone only, never from the failing drive again.
But even then, you need to be prepared for it to die mid-imaging. You get one real chance. And you do not run random “repair” tools that write to the disk.
Money part no one likes
Clean room recovery costs a lot. Where I live, quotes were roughly:
- Entry level: 400–600 USD for simple head swaps or board issues.
- Messy jobs with platter damage or multiple failed heads: 800+ and up.
That feels awful when you are staring at a single external drive. On the other hand, if that disk holds work files, tax records, client projects, family photos, you only have two realistic choices:
- Pay once for a professional attempt.
- Accept the loss.
What wipes out people is the in-between phase. They run ten different tools, freeze the drive, open it on their desk, tap it, flip the enclosure boards without backups, then show up at a lab with a drive that is way more damaged than on day one. The lab cost does not go down after DIY attempts. The chance of success goes down.
If your drive is still partially detected
Here is what I would do differently now if I had a clicking drive that still:
- Spins fully.
- Shows up in BIOS or Disk Management.
- Lets the OS see its capacity, even if access is slow.
- Power it off and do not keep testing.
- Decide how important the data is to you, in writing, on paper.
- “If I lose this, my life is wrecked” → lab.
- “It would suck, but I survive” → possible DIY imaging.
- If you try DIY, do one thing only:
- Use an imaging tool that is designed for bad disks.
- Set it to read only.
- Image to a second drive that is healthy and at least as large.
- If the drive starts getting louder, slower, or begins dropping out mid-imaging, stop. Do not replug it twenty times.
If the data matters more than the money, you skip step 3 and go straight to a lab. No diagnostics software. No filesystem repairs from Windows. No “scan and fix” prompts.
Where I am stuck
Right now my WD still gets seen intermittently. It:
- Clicks a few times on power up.
- Sometimes shows in Disk Management with the right capacity.
- Freezes the system if I try to browse it.
I have not sent it to a lab yet because I am still weighing how much those files are worth to me. Feels like a bad sign, but not completely dead.
So I am curious if anyone here has pulled data off a clicking external without a clean room and without making it worse. Not success stories with drives that only had logical problems, but ones that had the classic click and still ended up recoverable.
What worked, what ruined it, and where you drew the line.
6 Likes
First thing. Power that drive off and leave it off for now.
You are right to worry. Repeated power cycles on a hard clicking drive often take it from “hard but possible” to “nothing to recover”.
I will skip what @mikeappsreviewer already covered about heads, platters, and lab pricing and focus on what you do next in your specific situation.
Your symptoms
• Desktop drive, loud repeating click
• Windows will not boot from it
• Years of photos and work files, no backups
You need to decide how important this data is. Not in theory, in practice.
If losing it is unacceptable, stop DIY now and talk to a pro lab. Do not run chkdsk. Do not accept Windows “scan and fix”. Do not install anything on that drive. A lab will open it, swap heads or deal with internal faults, then image it with hardware tools.
If you accept some risk and partial loss, here is a controlled path.
-
Separate OS problem from data problem
Install a fresh OS on another disk or use a bootable USB. Keep the clicking drive as a secondary drive only. Do not try to boot from it again. Any boot attempt means lots of random reads over weak heads. -
Check detection, once
Enter BIOS with only power and data connected to the bad drive and your new system disk. If BIOS does not see model and size, software will not help. At that point it is straight to lab or give up.
If BIOS sees it by name and size and it spins up without endless rhythmic clicking, you have a narrow window.
- Forget “repair”, aim for imaging
Do not run file recovery tools directly on the bad drive. You want a raw clone first.
Use an imaging tool that supports unstable drives and sector by sector cloning, with options to skip bad blocks and retry lightly instead of hammering them.
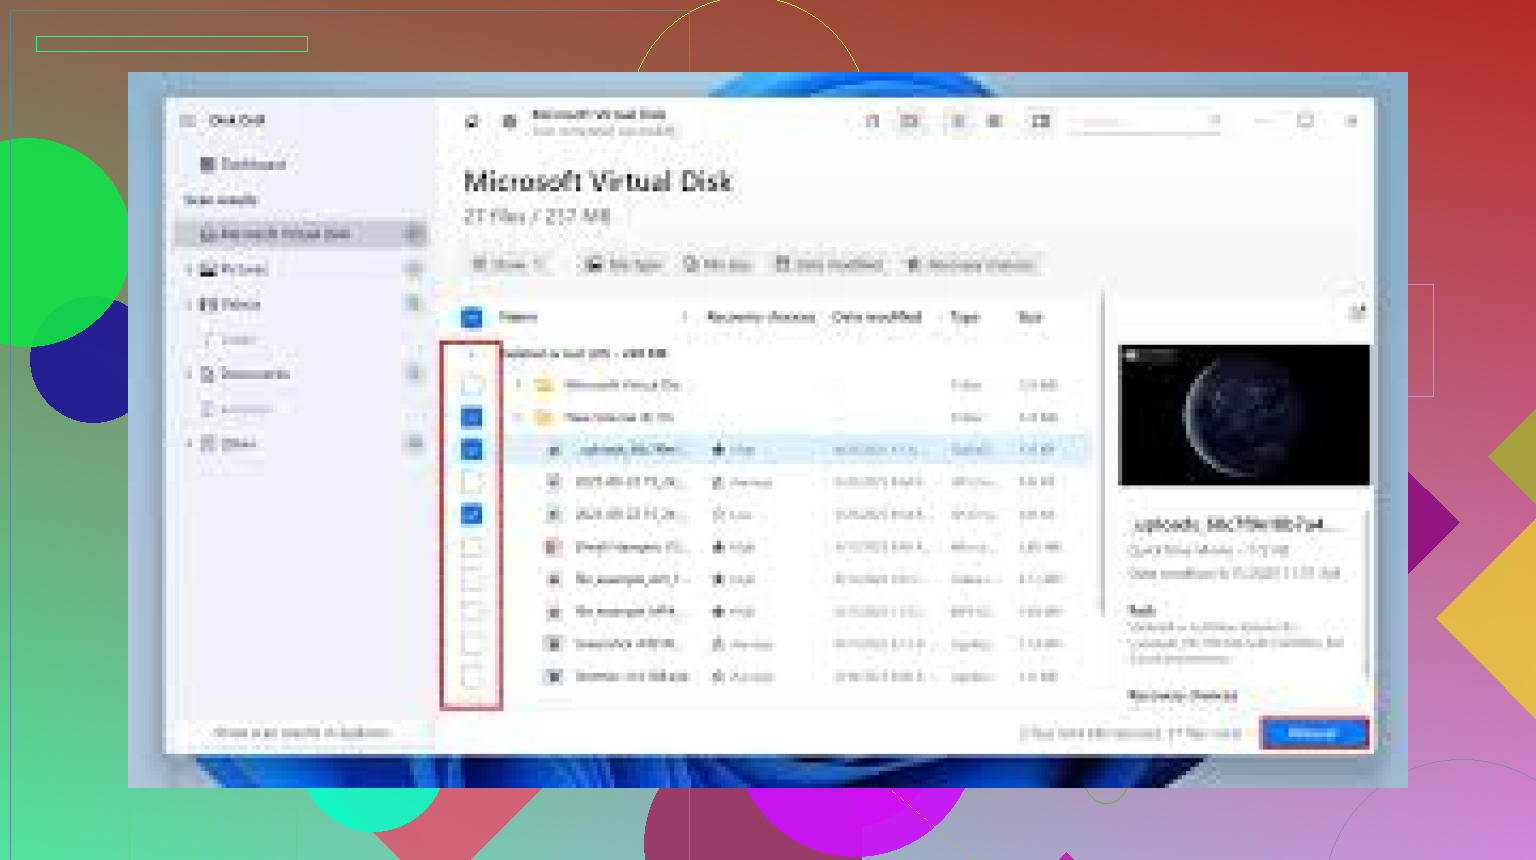
Disk Drill is an option on a separate healthy machine if the drive still mounts at all. You would attach the failing disk as a secondary drive, then tell Disk Drill to create a disk image. Work only on the image after that. Do not let any tool “fix” the original disk or write to it.
If the drive clicks hard, stalls the system, or drops out during imaging, stop. Every extra minute spinning in that state risks the heads scraping the platter.
- Do not try the internet myths
A few specific things reduce recovery chances almost every time:
• Freezer trick
• Tapping or twisting the drive
• Opening the cover outside a clean room
• Swapping random donor boards without matching firmware
People post the one time it helped. They do not post the ninety times it turned a recoverable disk into junk.
- Be careful with repeated power cycles
Many pros use a rough internal rule. Once a drive with head issues fails to stay stable for an imaging run, they keep power cycles to a minimum. Every spin up and down slams the actuator home and stresses weak parts.
So do not keep rebooting to “try one more thing”. Decide on one controlled attempt, then stop.
- Budget and realistic success rates
Independent lab stats often quote something like:
• Logical failures only, very high success
• Single head failure and clean platters, decent success, but cost starts near what @mikeappsreviewer mentioned
• Platter scratches, much lower success
You do not see the scratches from the outside. You only choose how much damage you add before a pro opens it.
If you go with a lab, ask them:
• Do they charge a diagnostic fee
• Do they offer a “no data, no fee” policy
• What media they return your data on
• Whether they keep an image for a while in case of copy issues
- About your future backups
Once this is over, put anything important on at least two independent places. For example, internal disk plus external disk, or internal disk plus cloud. That way a single mechanical failure does not take everything.
On your SEO-style request, a clear phrase you can use for this topic would be:
“how to recover data from any damaged hard drive, including clicking HDDs, dead external disks, and unbootable system drives”
If you want a quick walk through of the process in video form, this guide on recovering files from a failed hard drive step by step explains the difference between logical fixes and physical failures and shows safer ways to approach both.
So, short version for your current drive
• Stop powering it on for now
• Decide how critical that data is
• If it is critical, go straight to a lab
• If you accept risk, try one controlled imaging attempt from another OS, ideally with a tool like Disk Drill, then stop touching the original drive and work only from the image
First thing: stop powering that drive on. You already had the “oh crap” warning sign: hard clicking + no boot. Every extra spin now is gambling with the only copy of your stuff.
@mikeappsreviewer and @voyageurdubois already nailed the big picture (heads/platters, labs, imaging-first). I’ll just fill in some gaps and slightly disagree in a couple spots.
- Decide your line in the sand
Write this down, literally:
- “If I lose these photos / work files, it’s life‑changing” → no DIY, straight to a data recovery lab.
- “It would hurt, but I’ll live” → carefully controlled DIY, once.
Where I slightly disagree with them: some people wait too long trying to “research everything” and the drive sits half-dead for weeks, then they get tempted and plug/unplug it randomly when it’s already worse. Decide your plan in hours, not weeks.
- Physical vs logical: your drive almost certainly has a physical issue
Given:
- Loud, repetitive clicking
- System drive, won’t boot
That’s almost never a simple filesystem error. chkdsk, “scan and fix,” or any “repair my disk” wizard is the last thing you want. Those all try to write to a drive that is already misreading sectors.
If BIOS does not see the correct model and full capacity anymore, software recovery tools will not resurrect it. At that point, only a lab with clean-room, donor parts, and hardware imagers has a real shot.
- If you must try a DIY approach
Only do this if the data-value vs money equation makes sense to you.
- Pull that drive out of the desktop.
- Install Windows or Linux on a totally separate, healthy drive. Use that as your boot disk.
- Connect the bad one as a secondary (ideally via a USB/SATA dock so it’s easy to unplug fast).
One single test:
- Boot from the good drive.
- See if BIOS and then the OS detect the bad drive by name and full size.
- If it spins up, gives a couple clicks, but stays online, you have a narrow window.
In that case, your only DIY move should be imaging, not “recovery” directly:
- Use something that can deal with unstable disks and create a sector-by-sector image.
- Do not browse the drive in Explorer, do not open photos directly from it. That makes the heads jump all over the platters.
Disk Drill is actually decent here:
- Run it from your healthy system disk.
- Tell it to create a full disk image of the failing drive onto another good drive of equal or larger size.
- Work only on that image afterward, never again on the original drive.
If during imaging the clicking ramps up, speed crawls, or the drive drops out, stop. Don’t replug it 15 times “just to see.” That’s where people turn maybe-recoverable head damage into real platter scratches.
- Stuff that destroys your chances
Agreeing with them but repeating since this is where panic kicks in and logic dies:
- “Freezer trick”
- Tapping the drive on the desk
- Opening the cover to “clean it”
- Random PCB swaps with another drive from eBay
Internet loves those stories because a 1% miracle becomes a legendary post. The 99% “now it’s toast and the lab can’t get anything” cases rarely show up.
- When to throw in the towel on DIY
You are done with DIY and should either archive the drive as a lost cause or send it to a lab when:
- BIOS stops seeing it correctly.
- Clicking is loud, rhythmic, and it powers down by itself.
- Any imaging attempt makes the entire system hang or the drive disconnects repeatedly.
At that point, more power cycles do not “loosen it up” or “warm it up.” They just beat up already failing heads.
- If you do go pro
You already got ballpark costs from the others. A couple extra practical questions to ask a lab:
- “Do you charge just to look at it?”
- “Is it no data, no fee?”
- “What’s your success rate on drives with head clicking?”
- “Do you give a file list before payment so I know what you actually got?”
- Long-term lesson
This part sucks, but it’s the only actually reliable fix for the future:
Anything you would cry about losing needs at least two independent copies. For example:
- Main internal drive + external USB drive
- Or internal drive + cloud backup
One copy is none, two is one.
- For people finding this later via Google
If someone lands here searching “how to fix clicking hard drive” type stuff, the better mindset is:
- You don’t “fix” a clicking hard drive.
- You try to rescue data from a physically failing device, then replace the hardware.
A more useful guide for that is something like:
practical steps to handle a clicking hard drive without losing your files
That kind of checklist walks through recognizing the sound, when software still makes sense, when to power off immediately, and how to avoid turning a partial failure into permanent loss.
For your current drive, you’re basically choosing between:
- Accepting the cost of a professional clean-room attempt.
- Taking one careful shot at imaging with something like Disk Drill, then never touching the original again.
- Or accepting that this was the single point of failure and treating it as a very harsh backup lesson.
No magical fix button here, just risk management.
Short version: your odds depend less on “which tool” and more on “how much more you spin that clicking drive.”
A few angles that haven’t really been stressed yet:
1. Clicking pattern actually matters
You mentioned loud, repeating clicks. I’d add one nuance:
- Fast, metronome‑like clicking from the second it spins = almost certainly a head problem.
- Slower, irregular ticks that start only under load can sometimes be borderline electronics or weak sectors.
That second case is the only scenario where a short, carefully controlled imaging attempt has any real justification. If yours goes into instant machine‑gun clicking the moment it powers, skip straight to lab or write‑off.
I actually disagree slightly with the “one BIOS check, then decide forever” idea. You can do:
- One power‑up to confirm ID / capacity.
- One short imaging test limited to the first few GB.
If the drive hard‑locks or the click worsens, you stop there. That small extra test can tell you if it is even imageable without meaningfully increasing risk, as long as you are disciplined.
2. Why imaging from cold matters more than people think
Platters and heads expand as they warm. With marginal heads, that expansion can push them from “barely tracking” to “crashing.” So if you decide to risk DIY:
- Let the drive sit powered off until it is totally at room temperature.
- Power on only when your imaging tool is ready.
- Start cloning immediately and avoid stopping and starting the job.
Repeated short power cycles are worse than a single continuous read on a marginal drive, because each spin‑up slams the actuator home.
3. Where Disk Drill fits in, realistically
Everyone has said “make an image.” The practical issue is which tool does not absolutely punish a weak drive.
Disk Drill pros:
- Nice at working from images; once you have a clone, it is very user friendly.
- Can create a byte‑for‑byte image in a straightforward way, so you are not poking the failing drive through Explorer.
- Good at rebuilding file trees and previewing photos from that image later.
Disk Drill cons:
- It is still software that talks through the OS stack. On drives that lock up the bus, you will get freezes and disconnects. It does not replace hardware imagers that labs use.
- Default settings are not always gentle. You have to configure it to image first and avoid “quick scan” that jumps around the disk.
- On heavily degraded media, it can hang rather than degrade nicely, so you need to be ready to pull power if the system becomes unresponsive.
Compare that with the vibe from @voyageurdubois and @mike34: they are thinking more in terms of lab‑grade hardware imaging and strict “no touch” if you really care. @mikeappsreviewer did a good job spelling out heads / platters / lab costs but, like most of us, comes from the perspective that physical damage is not a software problem.
So if your drive is still detected, spins fully, and you have accepted the risk:
- Use Disk Drill’s disk image feature to target the failing drive.
- Save that image to a totally separate healthy disk.
- Keep reads linear, avoid scanning the full file system tree directly from the failing disk.
If Disk Drill chokes very early or the drive drops, do not start trying three more imaging tools. At that point, continued attempts are just lab‑chance erosion.
4. A slightly different decision rule
Others framed it as “life‑changing loss vs not.” I would add one more filter:
- If even a partial recovery of photos / key documents is worth a few hundred dollars, then physical clicking + unstable detection should already bias you to a lab.
- Only go DIY if you are emotionally prepared to lose everything and treat any recovered file as a bonus.
That mindset tends to prevent the usual spiral of “OK, this tool failed, let me try one more,” which is what really grinds the drive to dust.
5. Why I would not wait weeks
Where I do agree strongly with them: do not let this sit for months while you “think about it.” Drives that have already entered a clicking failure mode rarely get better with age. Lubricants dry, heads stick, and when you finally do decide to power it up again, it is often worse.
Give yourself a deadline:
- Within 24–48 hours, either send it to a lab, or
- Do one cold, controlled imaging attempt with something like Disk Drill, or
- Accept it as lost and move on.
No half‑measures, no repeated random plugging back into Windows to see if it “magically works today.”
So in practice for your case:
- Do not boot Windows from that drive ever again.
- If you are going to risk DIY, do a single, cold start with an imaging‑first tool such as Disk Drill, configured gently.
- Once that run fails or finishes, retire the original drive. All further experiments happen on the image.
- If that still sounds too risky for the files you described, skip all of it and let a lab make the first move instead.