My current web hosting plan is expiring soon and I want to move my whole site to a new host using FTP, but I’ve never done this before. I need a step-by-step guide or tips for safely transferring files and making sure everything works after the move. Any advice would be appreciated, especially if you’ve done this recently.
Wrestling with WordPress Migration: My Recent Adventure
Alright, so here’s the scene: I’m neck-deep in figuring out WordPress migrations. Not gonna lie, it’s one of those tech things that you think is just “copy pasta” until you realize you’ve got databases, file trees, mismatched plugin versions, and a stomachache. But stick with me—maybe my potholes will save you a few.
Manual Migration: Where Only the Brave Survive
First up, if you’re daring enough to manually move your WordPress site, start with the actual official manual migration guide—DON’T try to wing it. It reads a little like an old-school instruction manual, but in this context, that’s a good thing. Seriously, skip the sketchy blogs—otherwise you’ll end up with broken permalinks and a 3:00 AM existential crisis.
Fast Lane: Tools That Don’t Suck Your Soul Out
But—real talk—if you’re allergic to the command prompt (join the club), let me rave for a sec about a trick I tried. So, I stumbled onto CloudMounter during a frantic mission to move files between hosting accounts. It basically acts like a universal plug for all your cloud services, but the gem here is making regular ol’ FTP (or SFTP) servers show up in Windows File Explorer.
No more awkward file managers, no more double downloads. You just drag files from your old host to the new one, as if moving them between folders. It spared me the usual, “WAIT, WHICH FOLDER WAS I EVEN IN?!” confusion.
How I Nailed the FTP Setup
So if you’re on Windows and curious how this shakes out, here’s what I did:
-
Grab the App: Download and get CloudMounter up and running. Setup is painless.
-
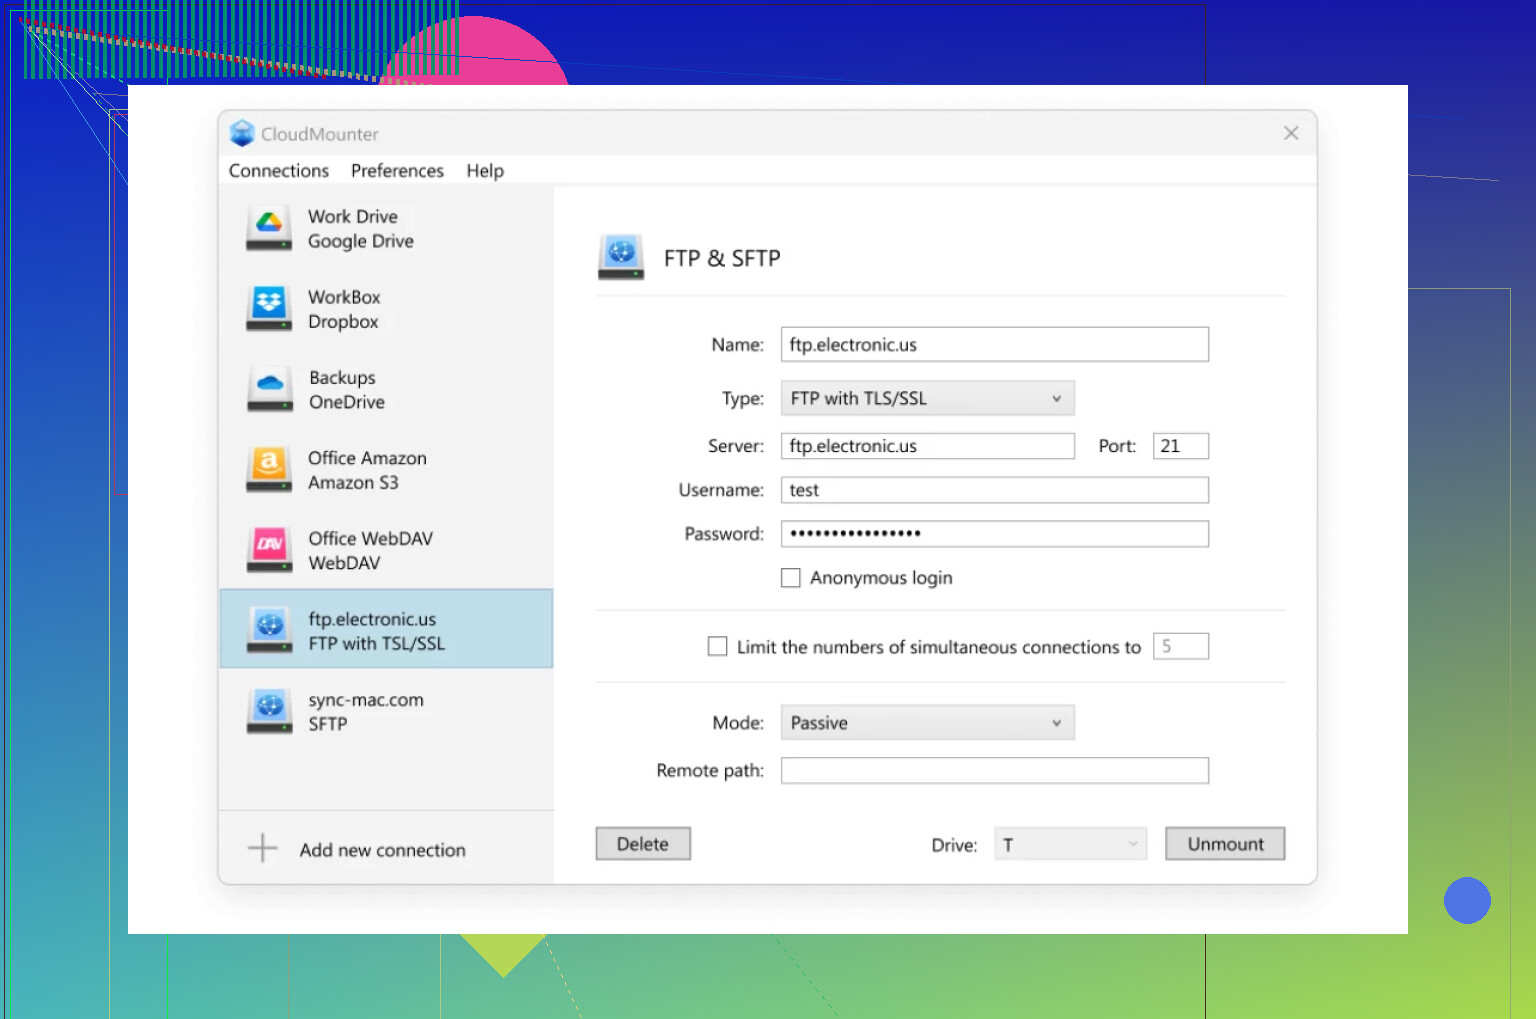
Fire It Up: Launch CloudMounter, poke around, and hit the “FTP & SFTP” storage option. You’ll see icons for different clouds—they’re not what you want for this.
-
Connection Details: As soon as the dialog pops up, pick “FTP.” Plug in your server’s address, the usual port (21), credentials, and decide between “Active” or “Passive” mode (I just left all defaults, since my host is basic). Toss in the remote path if you want to drop straight into a folder.
-
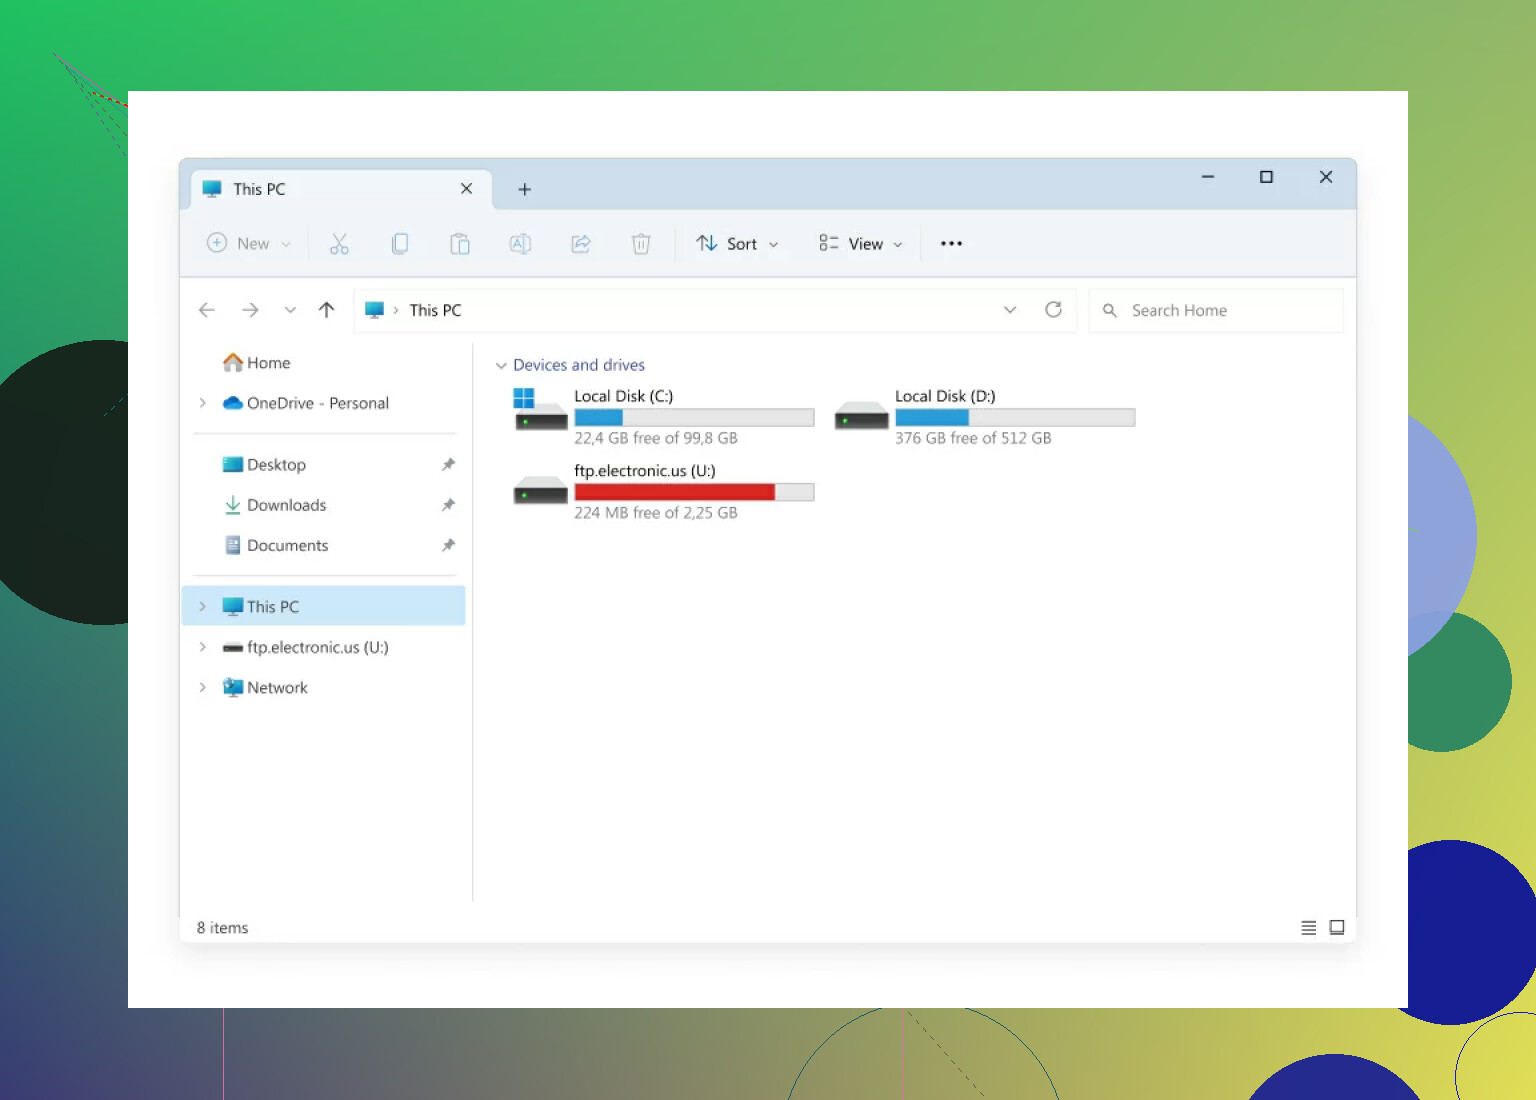
Mount It: Slap that “Mount” button. If it connects, you’re golden—your FTP server will now be chilling in File Explorer alongside your C: drive.
What I Wish I Knew Before
Honestly, I lost a solid evening trying to manually juggle FileZilla, Windows Explorer, and a bunch of half-downloaded zip files littered on my desktop. If you’re more about results and less about “learning by frustration,” this method feels like a magic trick.
Still—follow the official docs for the database part, since this trick mostly helps with file shuffling. No sense in blowing up your WordPress install because you swapped out the wp-content but forgot about the SQL.
TL;DR: Tools like CloudMounter make the whole WordPress-moving process feel a lot less like a root canal. Just remember: always have a backup, double-check your database import, and consider therapy after your first failed migration attempt.
Good luck!
14 Likes
Not to throw shade at @mikeappsreviewer’s CloudMounter hype train, but you totally can get by without extra mounting software, especially if you just need one move and aren’t planning to shuttle files around day-to-day. FTP’s always gonna feel a bit clunky compared to local file moves, no matter the wrapper you slap on it.
That said, here’s a straightforward, old-school manual approach (kinda “by the book”) if you wanna avoid new apps or subscriptions:
- Back up your stuff like your digital life depends on it. Don’t trust your current host to keep a working copy, especially when expiration looms. Download your entire site folder (usually
public_htmlorwww) using FileZilla or another FTP client. If WordPress, make sure you get everything including.htaccess(hidden files). - Don’t forget the database! This is where rookies crash and burn. FTP won’t grab your database—you need to log into cPanel/phpMyAdmin, hit “Export,” and grab a .sql backup of your website’s database.
- On your NEW host: Re-upload everything where it belongs via FTP. Don’t just drag & drop the ZIP archive expecting your new server to magically unzip & install it. You’ll need to unpack and upload the real folders/files.
- Recreate the database: Use cPanel/phpMyAdmin on the new host. Create a DB and user, import your .sql file. Then update your config (e.g.,
wp-config.phpfor WordPress) with the new credentials. - Update DNS settings. No FTP trickery will help if your domain shoots visitors at your old host—point that domain over to your shiny new setup.
A few “don’t step in it” tips:
- Set FTP to binary transfer for images/binaries. ASCII mode messes files up.
- If you have massive files, FTP transfers might time out. Do smaller batches if needed.
- Do a dry run before making DNS changes—edit your computer’s hosts file to preview from the new host, so you’re not accidentally launching a busted site.
CloudMounter is fine for Windows drag-n-drop types, but if you just wanna zip/unzip and drag with FileZilla or WinSCP, that’s perfectly valid—and free. Just… whatever you do, don’t skip the database because no file mover will grab that for you.
Feel free to poke holes in this or debate tools—honestly, migration always feels like every method is 20% easier and 80% more annoying than it looks in guides.
If you want pure efficiency and minimal headache (plus, you know, staying sane), don’t limit yourself to just FTP and FileZilla land or even the File Explorer hacks—although @mikeappsreviewer and @techchizkid make solid points. But let’s be real for a second: everyone forgets the stuff outside the WordPress scene, like those cron jobs, email forwarders, or even subdomains that don’t live in public_html (just me?). File transfer is like half the battle, and honestly, a boring one. The real pain is everything that isn’t covered by dragging folders.
FTP is, like, ancient technology—slower than a snail in molasses, and if you have a ton of files, expect timeout errors or inexplicably missing plugins when you finally log in. If you want a smoother ride, try zipping up your web directory ON the server (most hosts have a file manager for this). Download one big chunky .zip instead of 8000 microfiles. Upload to your new host and unzip there. Saves you HOURS of watching files slooowly creep down your download bar.
And yeah, as was mentioned—grab that SQL file or your database will vanish like socks in a dryer. SERIOUSLY, if you don’t, you’ll have an empty shell of a site, and nobody wants to rebuild posts from scratch.
One slightly controversial (but awesome) method: see if your new host offers a migration service. Sometimes it’s free, sometimes a few bucks, and they literally do it all for you. Automation is king, don’t @ me.
If you’re dead set on FTP, I won’t fight you (much). CloudMounter can actually help you dodge the annoyingly clunky FileZilla interface—you can mount both servers and just drag stuff. But let’s not pretend it’ll do the whole migration for you. That database step is 100% manual unless you spring for migration tools or plugins.
TL;DR: Zip first, transfer less often, automate if possible—and for the love of all things digital, don’t forget your database. FTP alone will let you down faster than a discount parachute. If all else fails, CloudMounter can soften the pain a bit, just don’t expect miracles.
Here’s a hot take: FTP is the tech equivalent of passing notes in class—outdated, slow, but sometimes still the only channel you’ve got. Props to the others for sharing deep dives, but let’s spin it another way.
If you absolutely must use FTP (say, no SSH, cPanel, or host-to-host migration available), efficiency is your friend. I always recommend compressing everything into a .zip on your current host—way faster to move one fat file than 20,000 piddly HTML and PHP scripts. After download, upload to your new host, unzip, fix up your configs, done. You still need to export/import the MySQL database via phpMyAdmin—nobody’s found a shortcut for that part (yet).
Now, about CloudMounter—superb for people who hate clunky interfaces like FileZilla or want that “mount-it-like-a-drive” magic. It’s snappy, integrates with Windows Explorer, and takes the pain out of file selection. Bonus points if dragging between two servers at once. Downside? Not free, no built-in SQL handling, and sometimes advanced FTP features (permissions, timestamps) get funky. Use it in combo with old-school FileZilla or WinSCP for granular control. For absolute beginners or anyone on Mac, it’s extra-friendly compared to traditional tools.
Some legends (like @techchizkid and @boswandelaar) go straight for automated plugins or host-provided migration. Also smart—unless you have custom stuff outside /public_html (cron jobs, email configs, hidden scripts), which those tools often miss. Manual is only for the brave or desperate.
Recap: Zip first, FTP less, CloudMounter for the UI boost—but remember, no tool can fix a missed SQL export or a half-baked plugin update. Always triple-check what you’re moving. Want a zero-headache option? If your new host offers a free migration, just let them sweat it instead.