My camera’s SD card suddenly became unreadable and now both my camera and laptop say it’s corrupted. It has important family photos I never backed up, and basic fixes like trying another card reader didn’t work. What tools or steps can I use to safely recover as much data as possible without making things worse?
Been through this exact mess. SD card flipped to RAW, Windows started yelling “you need to format this drive,” and my brain went straight to “there goes every photo from that trip.”
Short answer from my side: I did get a lot of files back on Windows 11, but only after I stopped panicking and stopped clicking every button in sight.
Here is what helped, in plain steps.
-
Stop touching the card
I pulled the card out as soon as I saw RAW in Disk Management.
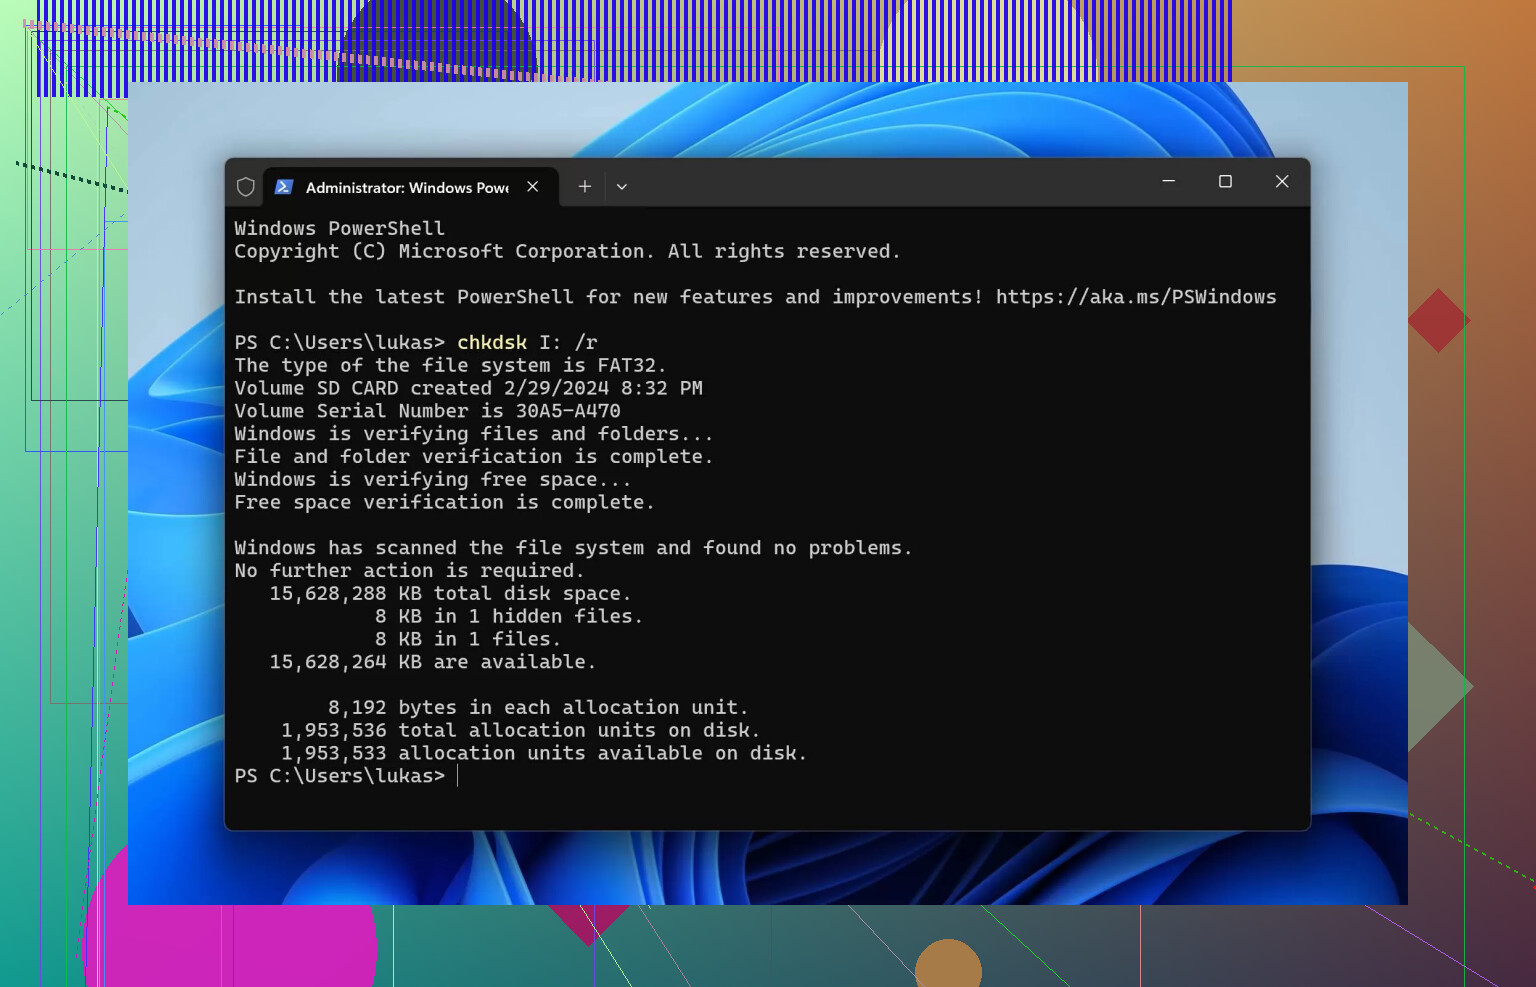
No format. No chkdsk. No “scan and fix” from Windows.
Every write to that card risks overwriting stuff you still want. Reads are risky enough, writes are worse. -
Forget about “fixing” the file system first
A RAW card usually means the file system header is damaged.
If you try to repair it first, some tools overwrite metadata, cluster info, folder structure.
Your goal at this point is not to heal the card. Your goal is to grab whatever files are still there and get them off. -
Make an image of the whole card
This part helped the most for me.
I used a sector-by-sector imaging tool and cloned the whole SD card to a file on my SSD.
Rough steps I followed:- Plug SD into a USB card reader
- Open a disk imaging tool
- Select the SD card as source
- Save to a .img file on a healthy drive
Then I did all recovery work on that image instead of the real card.
Reason: my card started dropping out mid-scan after a few tries. If I had not imaged it early, I would have lost more.
-
Use a proper USB reader, not a phone
When I tried reading it through the camera and a USB cable, Windows either did not see it, or wanted to “repair” it.
Phones and cameras sometimes auto-write things like thumbnails or “fixes” to the card.
A basic USB card reader is boring and dumb, which is exactly what you want here. -
Watch for freezing or disconnects
On my PC, whenever File Explorer stalled for a long time after plugging in the SD card, it was a sign the card hardware was struggling.
Symptoms I saw:- Disk Management hanging
- File Explorer locking up when I clicked the drive
- Card disconnecting and reconnecting randomly
That usually points to physical wear or controller issues on the card. You can still sometimes pull partial data, but expect scans to take ages and fail randomly.
-
Run recovery on the image, not the card
After I had the image, I fed that into data recovery software.
A few tips from that step:- Use “deep scan” or “raw recovery” mode
- Filter by file type like JPG, MP4, MOV to cut noise
- Save recovered files to a completely different drive
The result for me: - I got back most photos
- Some had broken previews or half-gray frames
- A few videos would not play past a certain point
-
Do not expect everything back
RAW usually means some structure is gone.
Common outcomes I saw:- Files with random names, no original folder structure
- Some photos that show thumbnails but fail to open at full size
- A few totally unrecoverable files that only show as 0 bytes or corrupted headers
If the card is not fried physically, you still often get a large chunk of photos and videos back, just not all of them in perfect shape.
-
Retire the SD card after recovery
This part hurts less than losing the photos.
Once an SD card has gone RAW on me, I treat it as done for anything important.
You might use it:- For testing stuff
- For files you do not care about losing
Or you bin it.
I tried reusing one years ago after a similar failure. Three weeks later, same story, more lost shots. Not worth repeating.
Quick recap for Windows 11 users dealing with a RAW SD card
- Do not format
- Do not run quick “repair” tools first
- Image the card to a file as early as you can
- Run recovery on the image, not the physical card
- Expect partial success, not perfection
- Never trust that SD card again for anything important
If you keep it slow and deliberate instead of clicking every repair button you see, your odds of pulling photos and videos off a RAW card stay a lot higher.
5 Likes
First, do not format and do not run chkdsk. On that I agree with @mikeappsreviewer.
I will disagree with one point though. Imaging the card is ideal, but if you do not feel safe with that kind of tool, it is safer to use a read only recovery tool than to poke at the card with diskpart or similar.
Here is a lean plan that often works.
-
Treat the card as read only
Use a simple USB card reader. Avoid the camera. Turn off any “auto import” feature on your PC so nothing starts writing thumbnails. -
Try a photo focused recovery tool first
For non technical users, a tool with a clear UI helps reduce mistakes.
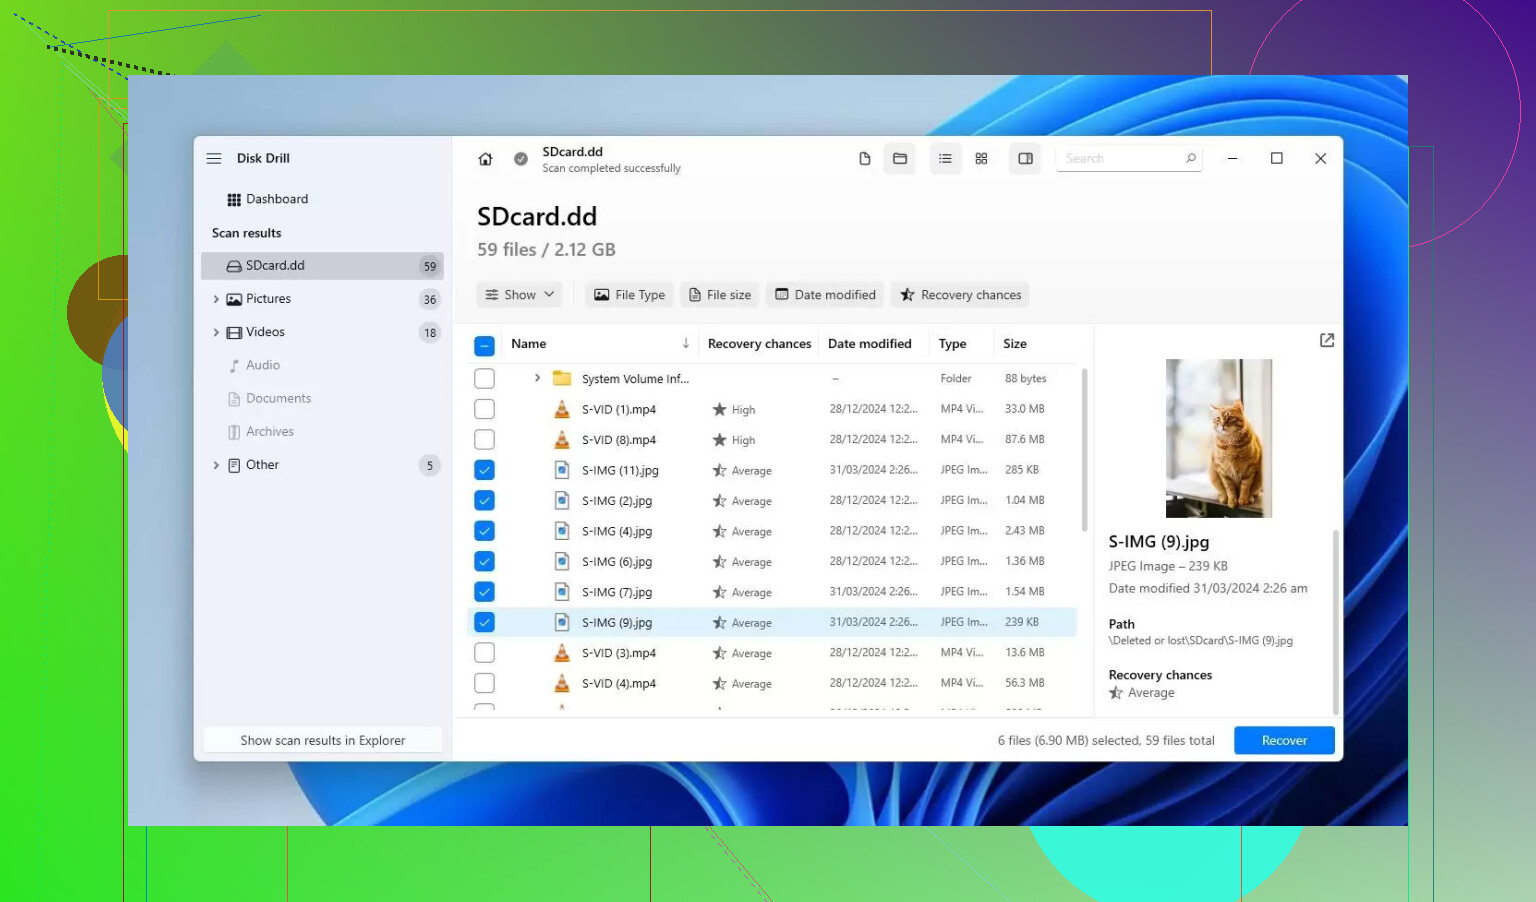
Disk Drill is one solid option on Windows and macOS for SD photo recovery.
Short workflow.
• Install it on your internal drive, not on the memory card.
• Launch it, pick the corrupted card from the disk list.
• Run a full scan with all recovery methods.
• Filter by file type, pick JPG, RAW formats your camera uses, and video formats.
• Preview files where possible before recovery.
• Recover only to another drive.
Photo specific tools often understand EXIF and camera RAW formats better than generic file tools. That helps keep more images viewable.
- If the scan finds nothing, then image the card
If Disk Drill or similar shows zero files or crashes, then move to the image step like @mikeappsreviewer explained.
Use something like:
• On Windows, tools such as HDD Raw Copy Tool or GNU dd for Windows.
• On Linux, ddrescue is safer than dd, it retries bad sectors and logs progress.
Once you have a .img file, re-run Disk Drill or other recovery software on the image file instead of the physical card.
- Try a second tool for different algorithms
Different tools use different signatures. If Disk Drill recovers partial data, run another one on the same image file, not the real card.
Examples that often bring back more:
• PhotoRec for deep signature based scan. Ugly interface, strong results.
• R-Studio for those who do not mind a more technical UI.
- Decide on when to stop
If:
• The card disconnects all the time.
• Imaging takes hours and the speed drops to zero.
• Repeated scans keep finding fewer files.
Then the flash cells or controller likely fail. At that point, every extra attempt risks more damage. For high value family photos, a pro lab starts to make sense, even if it hurts the wallet.
-
About physical damage and pro recovery
If the card ever got wet, bent, or was used in many different cheap readers, controller damage is common.
A pro lab can remove chips and read them directly. That is expensive, often 300 to 1000 USD, but success rates are better when a user has not formatted, zero filled, or run chkdsk. -
Do not reuse the card for anything important
On this I fully agree with @mikeappsreviewer. Once a memory card flips to RAW or shows read errors, retire it. Reuse only for test files.
For later, learn a bit about how these cards work. This guide on how SD memory cards store and lose data explains why they fail and what shortens their life.
If you follow one recovery path, keep it controlled. Use one reader, one PC, one or two tools, and avoid “quick repair” buttons from the OS. That steady approach gives your photos a better chance.
Pulling from what @mikeappsreviewer and @cazadordeestrellas already said (and mostly agree with), here are some extra angles that might help, without just rehashing the same steps.
1. Decide how “valuable” these photos are, right now
Nobody likes this question, but it changes the strategy:
- If these are once‑in‑a‑lifetime family shots and you’d pay a few hundred bucks to get them back, stop DIY early.
- If they’re important but not “mortgage‑level” important, DIY makes sense.
Both of them mentioned pro labs only at the end. I’d actually flip that: if the card is clicking, vanishing constantly, or got wet/bent, professional recovery should be your first thought, not your last.
2. Before imaging or scanning: lock things down
They are right about avoiding writes. I’ll add a couple of extra “paranoid mode” steps:
- Use a card reader that has a physical write‑protect switch on the SD slot, and flip it to LOCK.
Some readers ignore it, but many don’t. Cheap extra safety. - On Windows, disable:
- “Automatically fix file system errors” prompts
- Any camera-import software that pops up and starts creating folders/thumbnails
Small thing, but I’ve seen photo managers quietly “repair” drives and ruin recovery odds.
3. Imaging vs going straight to Disk Drill
Here I’ll disagree slightly with both:
- @mikeappsreviewer says “image first.”
- @cazadordeestrellas says “try a read‑only recovery tool first.”
My take:
- If the card behaves normally (shows up instantly, no freezes, no disconnects), I’m ok with starting directly with a read‑only tool like Disk Drill.
- If Windows hangs, disk list takes forever, the drive appears/disappears, imaging first with something like
ddrescueis safer, because you might only get one semi-clean pass.
So: behavior of the card decides the order, not one fixed rule.
4. Use multiple tools, but on the same copy
Both already touched on this, but the trick a lot of people miss is:
different recovery tools excel at different things.
Once you have either:
- A card that is still stable
or - An image file of the SD card on your SSD
Then you can chain tools in this kind of order:
- Disk Drill
- Nice UI, good at camera photo formats, good previews
- Use “all recovery methods”
- Filter by JPG, your camera RAW (CR2/CR3/NEF/ARW, etc.), plus MP4/MOV
- PhotoRec
- Ugly, powerful
- Great for deep, raw signature scans when the file system is totally trashed
- R‑Studio or similar
- More technical
- Useful if you want to try to rebuild folder structure or if the partition table is weird
Key thing: run all of these on the image file if you made one, not directly on the physical SD each time. That reducs the risk of the card dying mid‑experiment.
5. Don’t obsess over “fixing” the SD card itself
Both of them already argue against chkdsk, quick repairs, etc., and I’ll double down:
trying to “repair” the filesystem first is like gluing a puzzle together before you’ve checked which pieces are missing.
If the OS is asking to format or check the card to fix why files suddenly become unreadable and drives stop working properly, the real priority is still: extract files first, worry about the card never again.
If you must experiment with repair tools, only do it:
- On a clone of the SD card, never on the original
- After you’ve tried raw photo recovery
6. When you should seriously stop DIY
Some red flags that tell you it is time to walk away from home recovery:
- The card now appears as 0 MB capacity in every tool
- It gets too hot to touch after a short scan
- You hear faint electrical noises or random disconnect / reconnect every few seconds
- Every new attempt gives you fewer recoverable files, not more
At that stage, repeated home attempts are not “one more shot,” they are more like grinding the chips down. That is the scenario where a clean, untouched card gives a lab the best shot.
7. Aftermath: backup habits that actually get followed
Everyone says “backup more,” then does nothing. What usually works in real life:
- Turn on automatic cloud backup on your phone and camera app if possible
- Use a simple rule for your camera:
- After every big event/trip, copy photos to PC
- Then copy that folder to an external drive
- Keep SD cards as temporary storage, not an archive
SD cards are consumables. When you see the first weird behavior (random read errors, RAW format, files vanishing, unusual slowness), that card has already told you its story. Do not argue with it.
So, summary version for your situation:
- Stop any “repair” or format attempts.
- Use a dumb USB reader, write‑lock if possible.
- If the card is flaky, image it first, then run Disk Drill and other tools on that image.
- If scans keep failing or the card acts physically broken, pause DIY and seriously consider a lab if those family photos are irreplaceable.
- Whatever happens, retire that SD card from anything important.
Quick add‑on from a more “no‑nonsense” angle, since @cazadordeestrellas, @kakeru and @mikeappsreviewer already nailed most of the workflow:
1. When to actually pick Disk Drill vs the other tools
They all mention Disk Drill as a first stop, which I mostly agree with, but I would split it like this:
-
Use Disk Drill if:
- You are on Windows or macOS
- Card is still detected with the right size
- You want a UI that shows previews and simple “scan / recover” buttons
-
Jump straight to PhotoRec / R‑Studio / ddrescue if:
- The card is doing weird stuff like disappearing during scan
- It shows up with the wrong capacity
- You are comfortable with more technical tools
So I am a bit stricter than @cazadordeestrellas about trusting a “photo focused” tool first. If capacity looks wrong or access is flaky, I would image with ddrescue before any higher level tool, even read‑only ones.
2. Disk Drill: real pros and cons
Since it keeps coming up, here is a blunt rundown:
Pros of Disk Drill
- Clean interface that makes it hard to accidentally format or overwrite
- Good at recognizing common photo and camera RAW formats
- Solid preview feature so you can see if a JPG or RAW is actually openable before saving
- Supports scanning from an image file, which fits the image‑first strategy from @mikeappsreviewer
- Works reasonably fast on small SD cards if the card is not physically failing
Cons of Disk Drill
- Free version is very limited for real‑world photo disasters, so expect to pay if the scan looks promising
- Not as good as ddrescue at handling a card that keeps throwing read errors or dropping off the bus
- Deep scans can produce tons of fragmented files with generic names, which can be frustrating to sort
- On very badly corrupted cards, it might show a “nice” folder tree that gives you hope, but many of those files will not actually open
So use Disk Drill as a recovery scalpel, not as a drive “repair” button.
3. One point where I disagree with what you might infer from the others
Because everyone is (rightly) yelling “do not format,” people often end up doing nothing at all for days. That is just as bad.
- If the card is logically corrupted but physically stable and the photos really matter, waiting a week to “research more” can let a borderline card deteriorate further if you keep plugging it into random devices.
- I would pick one machine, one reader, follow either the Disk Drill path or the ddrescue image path and commit within a day, rather than trying ten tools over two weeks like many do.
Delaying forever is another way of gambling.
4. How the three approaches complement each other
Very short comparison so you can decide which mindset to follow:
-
- Strong on “image first” and treat the card as a decaying source
- Great if you are okay with more technical tools and want maximum safety
-
- More approachable, tool‑driven workflow with Disk Drill and PhotoRec
- Good balance for users who are nervous about command line imaging
-
- Emphasizes watching the card’s behavior and adjusting strategy
- Useful if your card behaves inconsistently and you are not sure which camp to follow
You do not need to mix every idea. Pick one main path that matches your comfort level, treat the card as single‑use, try Disk Drill or the imaging approach once in a controlled way, and then stop before you “experiment” the card to death.