Recently, my WiFi connection has been really slow and unstable. I suspect it might be due to interference from neighboring networks. What are some effective tools or methods to scan WiFi channels on a Mac? Any recommendations or step-by-step guides would be greatly appreciated.
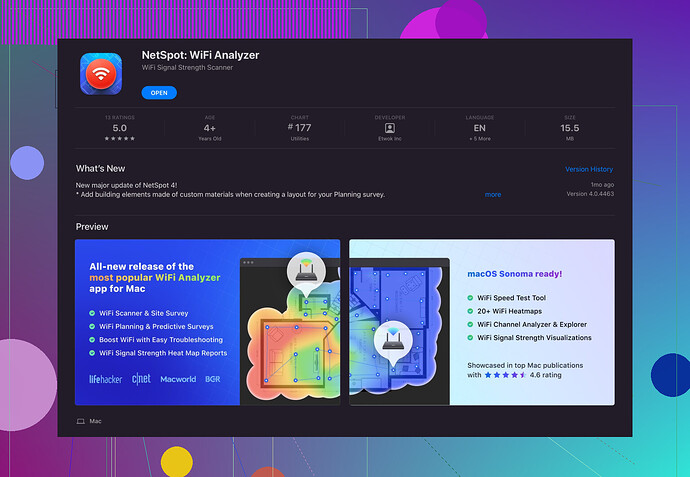
802.11 Wi-Fi networks often experience interference, especially in crowded urban areas. If you’re on a Mac and dealing with slow and unstable WiFi, there’s a great tool that can help you get to the bottom of it. Personally, I’ve found ‘Netspot for Mac’ to be incredibly effective for this kind of thing.
To get started, there are several methods you can use:
1. Wireless Diagnostics Utility:
- Hold the Option key and click the Wi-Fi icon in the menu bar.
- Select Open Wireless Diagnostics….
- Follow the prompts (you can hit Command+2 to quickly access the Wi-Fi Scan from within the diagnostics).
- Hit Scan, and it will show you nearby networks, their channels, signal strength, and more.
2. Netspot for Mac:
- Download and install Netspot for Mac from their website.
3. Built-in System Info:
- Open Terminal and type
system_profiler SPAirPortDataType. - It spits out detailed information about your Wi-Fi, including networks and channels.
If you’re dealing with a lot of overlap in your WiFi channels, these tools can help you identify the best channels to switch to. Often, simply changing from, say, channel 6 to 1 or 11 can make a significant difference. Also, consider upgrading your router to one that supports 5 GHz, which generally has less interference compared to 2.4 GHz networks.
For a comprehensive and user-friendly experience, check out this WiFi tool for Mac. I’ve used Netspot numerous times, and its detailed insights make it well worth it.
Good luck, hope your WiFi situation improves!
Another alternative to consider is the ‘WiFi Explorer’ app for Mac. While @reveurdenuit mentioned some excellent tools like the Wireless Diagnostics Utility and Netspot for Mac, I think WiFi Explorer also deserves some spotlight. It’s quite robust and user-friendly.
Here’s how you can get started:
- Download WiFi Explorer from the Mac App Store.
- Launch the application and it will automatically start scanning for WiFi networks around you.
- You’ll get detailed insights into each network’s signal strength, channel allocation, and more.
Why WiFi Explorer?
- It’s very intuitive, giving you real-time updates.
- The color-coded graph makes it easy to identify channel congestion.
- They have a professional version if you need advanced features like spectrum analysis.
Switching Channels:
Changing your WiFi channel can indeed solve the interference problem. Once you’ve identified the least crowded channel using one of these tools, you can usually change the channel settings in your router’s admin interface.
Tip for 5GHz Networks
If not mentioned already, the 5 GHz band, although having a shorter range, is typically less crowded and generally free from interference found in 2.4 GHz networks. This might be useful if most of your devices support 5 GHz.
Balancing Act
Just one thing to note, while switching channels can improve performance, it’s not always a cure-all solution. Factors like the router’s position, the number of connected devices, and even the type of building material can affect signal strength.
By the way, you can also learn more about ‘Netspot WiFi Analyzer for Mac’ to avail of user-friendly visual maps which help in better analysis of WiFi channels.
Overall, experiment with a few of these tools to see what gives you the best insight and results!
While @voyageurdubois and @reveurdenuit have given some solid advice on how to scan WiFi channels on a Mac, I’d like to throw one more useful tool into the mix - iStumbler. It’s another great utility that can give you a wealth of information about nearby networks.
Using iStumbler:
- Download and install iStumbler from their official site.
- Launch the application and start it up.
- You’ll get a detailed list of WiFi networks, along with their channels, signal strength, and encryption types.
Why iStumbler?
- Pro: It’s straightforward and easy to use.
- Con: It doesn’t have advanced visual mapping like Netspot; it’s more of a quick network scanner.
For those who appreciate visual data and in-depth analysis, NetSpot for Mac stands out for several reasons:
- Pros:
- Offers detailed WiFi heatmaps.
- Helps in identifying weak WiFi spots in your area.
- User-friendly interface for both beginners and pros.
- Cons:
- It can be overwhelming if you’re looking for just quick info.
- Its comprehensive features may require a bit of a learning curve.
In addition, if you’re on the hunt for something a bit more professional with spectrum analysis, WiFi Explorer Pro is an excellent mid-tier choice. It’s slightly more advanced than the basic version and offers richer insights for those who want meticulous control over their networks.
Router Positioning and Environmental Factors:
- Changing channels might not always do the trick. Sometimes, relocating your router to a more central location can make a significant difference.
- Avoid placing it near metal objects or microwave ovens, as these can also interfere with the signal.
5 GHz Networks:
- As hinted by others, the 5 GHz band is less congested and might be a viable solution if your devices support it. It offers faster speeds though at a reduced range compared to 2.4 GHz.
Lastly, if you’re dealing with a multilayered building, consider mesh WiFi systems. They can provide more consistent coverage and work well in larger spaces or problematic layouts.
In summary, while each tool has its benefits, if you’re keen on detailed and comprehensible visual data, NetSpot for Mac remains a top choice. Experiment with a few tools and see what fits your needs best!
